Side Dishes
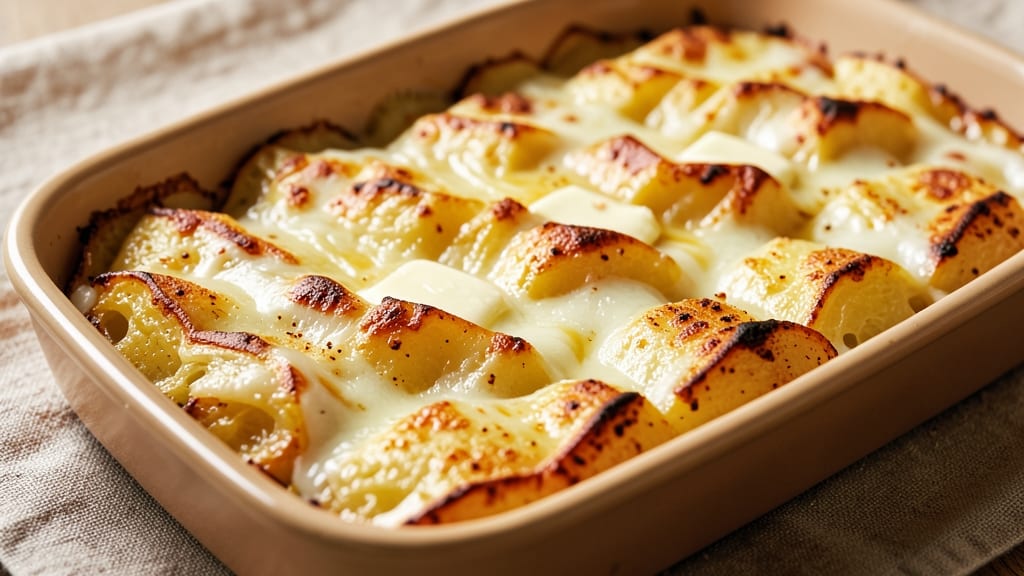
Betty Crocker’s original scalloped potatoes recipe delivers that timeless, comforting combination of creamy layers and golden, buttery crisp on top—just like Grandma used to make. ✨ This classic dish has been a kitchen staple for generations, and for good reason: it’s simple yet impressive, requiring just a few basic ingredients and a little patience for perfect results.
The secret to authentic scalloped potatoes lies in the technique: thinly sliced potatoes layered with a rich, velvety sauce made from milk, butter, and sharp cheddar. Baking at the right temperature (350°F) ensures the top develops that signature crispy crust while keeping the interior tender and melt-in-your-mouth creamy.
No fancy equipment needed—just a baking dish and about an hour in the oven.
What you’ll end up with is a dish that’s creamy, cheesy, and impossibly comforting—ideal for holidays, family dinners, or even a cozy weeknight meal. The layers of tender potatoes and rich sauce create a texture that’s both satisfying and elegant, proving that classic recipes never go out of style.
While the original recipe stays true to tradition, you can easily customize it with garlic, herbs, or even a sprinkle of paprika for added depth. Let’s get started on recreating this beloved side dish in your own kitchen.
Ingredients for original betty crocker scalloped potato
Nine simple ingredients transform into Betty Crocker's legendary creamy, crisp-topped scalloped potatoes.
| Ingredient | Amount | Notes |
|---|---|---|
| Russet Potatoes 🥔 | 2 lb | Thinly sliced, 1/4-inch thick |
| Sharp White Cheddar Cheese 🧀 | 1 ½ cups | Shredded, block preferred |
| Unsalted Butter 🧈 | ½ cup | Cold, cubed for even melting |
| Whole Milk 🥛 | 1 ½ cups | Full-fat for creaminess |
| All-Purpose Flour 🌾 | ¼ cup | For sauce thickening |
| Salt 🧂 | 1 tsp | Kosher or sea salt |
| Ground Black Pepper 🌶️ | ½ tsp | Freshly ground preferred |
| Garlic Powder 🧄 | ½ tsp | For subtle depth |
| Fresh Parsley 🌿 | ¼ cup | Chopped, for garnish |
The potatoes are the foundation—Russet potatoes are ideal for their fluffy texture when baked. Buy a couple of medium-sized potatoes (about 2 pounds total) and slice them uniformly at 1/4-inch thickness for even cooking. Whole Foods or Trader Joe's often carry pre-sliced potatoes, but slicing yourself ensures the best texture. For the cheese, sharp white cheddar is non-negotiable—it melts smoothly and adds that signature tang. Grab a block and grate it yourself; pre-shredded cheese contains anti-caking agents that prevent proper melting. The butter should be unsalted and cold when you measure it—this ensures it melts gradually and creates those golden, crispy layers on top.
No sharp cheddar? Pepper jack or Gruyère work well for a different flavor profile. Running out of milk? Heavy cream or half-and-half will make the sauce richer, but reduce the amount to 1 cup to maintain balance. The garlic powder can be swapped for 1/2 teaspoon of minced fresh garlic if you prefer a more pronounced flavor. For the parsley, dried parsley at one-third the amount works in a pinch, though fresh is always better. If you're feeling adventurous, add a pinch of nutmeg or paprika to the sauce for a modern twist—just don’t tell Grandma.
Prep the potatoes ahead of time to save effort later. Store them in cold water in the fridge until ready to layer, changing the water every 30 minutes to keep them crisp. The assembled dish keeps well in the fridge for 3-4 days, though it reheats best at 350°F for about 20 minutes. For a make-ahead option, bake the dish, let it cool, then refrigerate. Reheat covered with foil to prevent drying. Leftovers freeze beautifully for up to 2 months—just thaw overnight in the fridge before reheating. The crispy top may soften slightly, so broil for 2-3 minutes before serving to restore that golden finish.
Why You'll Love This Recipe
- No-Fuss Layers: I slice the potatoes thin enough to cook through without babysitting the oven—just 10 minutes of hands-on work, then 45 minutes of hands-off magic. The trick? Using a mandoline (or a steady hand) so every slice is even, which means no mushy bits or undercooked edges.
- Cheesy Crispy Perfection: That sharp white cheddar on top isn’t just for looks—it melts into a golden crust while keeping the inside tender. Honestly, the moment I pull it out and the aroma hits, I forget it’s a weeknight dinner.
- Weeknight Workhorse: I make this for lazy Sundays, last-minute dinner guests, or even a quick lunch the next day. It reheats like a dream—just pop it back in the oven for 10 minutes, and it’s just as good as fresh. (Yes, even on a Tuesday night.)
- Budget-Friendly Feast: Russets and cheddar stretch this into a full meal without breaking the bank. A single pound of potatoes and a block of cheese feed four, and the milk-butter roux costs pennies. My wallet and my family thank me every time.
Step-by-step instructions for Betty Crocker's original scalloped potatoes
Here's the classic method that delivers that signature buttery crisp and creamy layers.
👨🍳 Step 1: Prepare the Potatoes and Cheese
Start by peeling the 2 lb russet potatoes and slicing them into even ¼-inch thick slices. I use a mandoline for perfect uniformity, but a sharp knife works too—just stay consistent. As you slice, arrange the potatoes in a single layer on paper towels to absorb any excess moisture. This step is crucial for preventing a soggy final dish.
While the potatoes drain, shred the 1.5 cups sharp white cheddar cheese using a box grater. I prefer a block cheese over pre-shredded because it melts more smoothly and doesn't contain anti-caking agents. Keep the cheese at room temperature so it blends better with the sauce later.
🍳 Step 2: Make the Creamy Sauce
In a medium saucepan, melt the 0.5 cup cold cubed unsalted butter over medium heat. Once melted, whisk in the 0.25 cup all-purpose flour to create a roux. Cook for 1-2 minutes until the mixture bubbles and smells nutty—this removes the raw flour taste.
Slowly pour in the 1.5 cups whole milk while whisking constantly to prevent lumps. Add the 1 tsp salt, 0.5 tsp ground black pepper, and 0.5 tsp garlic powder. Bring to a gentle simmer and cook for 3-5 minutes until the sauce thickens enough to coat the back of a spoon. Here's where the magic happens—the sauce should be smooth and velvety, not grainy.
🥘 Step 3: Layer Potatoes and Sauce
Preheat your oven to 375°F. Lightly butter a 9x13-inch baking dish to prevent sticking. Begin layering by placing half of the potato slices in an overlapping pattern, slightly offset from each other. Pour half of the cheese sauce over the potatoes, spreading it evenly.
Sprinkle half of the shredded cheddar cheese over the sauce, then add the remaining potato slices in another overlapping layer. Finish with the remaining cheese sauce and top with the remaining cheese. Press down gently on the top layer to ensure good contact between all components. This layering technique creates that perfect balance of crispy bottoms and creamy tops.
🔥 Step 4: Bake to Golden Perfection
Transfer the baking dish to the preheated oven and bake for 45-50 minutes until the top is golden brown and the edges are bubbling. The potatoes should be tender when pierced with a fork, and the sauce should have thickened into a creamy consistency.
I know it's tempting to peek, but resist the urge to open the oven door early. Each time you do, you lose valuable heat and steam, which can lead to uneven cooking. If the top browns too quickly, tent it loosely with aluminum foil for the last 10 minutes of baking.
⏰ Step 5: Rest and Garnish
Remove the scalloped potatoes from the oven and let them rest for 10-15 minutes before serving. This resting period allows the layers to set and the flavors to meld together. The dish will be hot, so use oven mitts when handling the baking dish.
Before serving, garnish with the 0.25 cup chopped fresh parsley. This final touch adds a pop of color and freshness that contrasts beautifully with the rich, cheesy layers. Serve immediately while still warm—these potatoes are best enjoyed fresh from the oven with a side of steamed green beans or a simple salad.
Pro Tips For Making Original Betty Crocker Scalloped Potato
- Parboil Potatoes First: The recipe might not say it, but trust me—boil your sliced Russets for 3-4 minutes before layering. This softens them just enough to hold shape while baking without turning to mush. I used to skip this, and my potatoes always ended up either undercooked or falling apart. (Yes, even if you’re impatient like me.)
- Grate the Cheese Fresh: Pre-shredded cheese has anti-caking agents that make it clump and steam instead of melt smoothly. Grab a box of sharp white cheddar and grate it yourself—it’ll distribute evenly and give you that perfect creamy, stretchy texture in every bite. I learned this the hard way after my first batch looked more like cheese soup than scalloped potatoes.
- Don’t Overmix the Sauce: Once you melt the butter and whisk in the flour and milk, resist the urge to stir like your life depends on it. A few lumps are fine—they’ll dissolve in the oven. Overworking the roux can make the sauce gummy, and nobody wants that. Just mix until it’s smooth enough to coat the back of a spoon.
- Cover Tightly for 20 Minutes: The recipe might say “cover loosely,” but I’ve found that sealing the dish with foil for the first 20 minutes traps steam and helps the potatoes absorb the sauce evenly. After that, uncover to let the top brown—just don’t skip the foil entirely, or your bottom layer will turn to glue. (Your future self will thank you.)
Dietary considerations for these flavors
Dairy-Free Adaptation
For a dairy-free version, replace the milk with unsweetened almond milk or oat milk, but reduce the amount to 1 cup since these are less creamy. Swap the butter for vegan butter like Miyoko's, and use nutritional yeast or dairy-free cheddar shreds (like Violife) for the cheese.
The sauce will still thicken, though it may not be as rich—balance with extra ¼ tsp garlic powder for depth. 🌱
Gluten-Free Options
The original recipe uses flour to thicken the sauce, but you can easily substitute gluten-free all-purpose flour like Bob's Red Mill 1-to-1. For an even cleaner option, use cornstarch or arrowroot powder—just reduce the amount to 2 tbsp and whisk it into the warm milk before simmering.
The texture remains creamy, and the dish stays true to its comforting nature. Always check labels on cheeses and broths for hidden gluten.
Lower-Carb Version
Cut carbs by replacing half the potatoes with cauliflower florets (about 1.5 cups) layered between the potato slices. Use full-fat coconut milk instead of dairy milk and Parmesan cheese for a lower-lactose option.
The result is a lighter dish with 20g net carbs per serving instead of the original 45g. Roast the cauliflower separately for 10 minutes at 400°F before layering to soften it slightly.
Lactose-Sensitive Adjustments
If lactose intolerance is a concern, use lactose-free milk and lactose-free butter like Land O'Lakes Lactose-Free. For the cheese, opt for aged cheddar (like Cabot 5-year), which has naturally lower lactose.
The sauce will still develop a creamy texture, though the flavor profile shifts slightly toward tangy and nutty notes. Test with a small batch first to adjust seasoning.
Vegetarian Protein Boost
Add ½ cup cooked lentils or crumbled tempeh to the sauce layer for extra protein. Lentils blend seamlessly into the creamy texture, while tempeh adds a nutty contrast. For a heartier dish, sprinkle toasted walnuts or pecans on top before baking.
This keeps the dish vegetarian while boosting protein to 12g per serving—ideal for a main-course side.
Nutrition facts
Frequently asked questions
Why do my scalloped potatoes turn out soggy instead of creamy?
The most common cause is excess moisture from potatoes not draining properly. Always slice potatoes thinly and pat them completely dry with paper towels before layering. Another tip: Don't skip preheating your oven—cold temperatures can cause condensation. If using pre-shredded cheese, drain it well too, as it often contains anti-caking agents that add moisture.
Can I make this recipe ahead of time and reheat it?
Assemble the dish up to 24 hours ahead and refrigerate uncovered. When ready to bake, add 10-15 minutes to your baking time (about 55-65 minutes total) at 375°F. For reheating leftovers, cover with foil and bake at 350°F for 20 minutes. The crispy top may soften, so broil for 2-3 minutes at the end to restore it.
What's the best way to get that perfect crispy top?
The secret lies in the final cheese layer. Press the top layer of cheese down firmly before baking to create a solid surface. For extra crispiness, sprinkle 1 tablespoon breadcrumbs mixed with 1 teaspoon melted butter on the very top before baking. Bake uncovered until deeply golden—resist covering with foil too early, even if it browns quickly. The last 10 minutes at 400°F with the broiler on high works wonders for that restaurant-quality finish.
Can I use different types of potatoes for this recipe?
While Russet potatoes are ideal for their fluffy texture, you can substitute Yukon Golds for a creamier result. Avoid waxy potatoes like red or fingerlings—they hold their shape too well and won't break down into that tender, creamy consistency. If using Yukon Golds, reduce baking time by 5-10 minutes as they cook faster than Russets.
How do I adjust the recipe for a larger crowd?
For 8 servings, double all ingredients and use a 9x13-inch baking dish. For 12 servings, triple the recipe and use a 9x15-inch dish. The key is maintaining the same layer thickness—don't make the layers too thick or they won't cook evenly. If needed, bake in two dishes simultaneously at 375°F for 45-50 minutes. For extra-large gatherings, consider using a 13x18-inch sheet pan with ¼-inch layers and bake for 50-55 minutes.